

Hanging interior doors is one of those finishing tasks that looks deceptively simple — until you try to do it freehand. Getting three hinges perfectly mortised on both the door and the jam, at exactly the same depth and position every time, is where most DIYers run into trouble. The pros solve this with a dedicated hinge mortising jig, but commercial versions from major suppliers can run $400–$500 or more — overkill for most residential work.
The good news: you can build a fully functional, repeatable hinge mortising jig from plywood scraps and a couple of metal strips from the lumber yard for a fraction of that cost. This guide walks you through exactly how to do it, based on a proven shop-built design used in real residential finishing work.
Materials List
- 3/4-inch plywood — two strips approximately 20 inches long (plus a shorter center section), and one stop block piece
- 1/4-inch U-channel metal strips — two pieces, available at most lumber yards or home improvement stores
- Wood screws — 1-1/4 inch, for assembling plywood components
- Wood glue (optional, for reinforcement)
- Sandpaper — 120 grit for smoothing router surfaces
Tools List
- Router with a guide collar (also called a template bushing) — essential, not optional
- 1/2-inch straight router bit
- Tape measure and pencil
- Table saw or circular saw — for ripping plywood strips
- Drill/driver
- Two clamps — to secure the jig during use
- Hand chisel — for squaring corners on square-shouldered hinges
- Combination square
Watch It in Action
Before diving into the build, watch this short video walkthrough of the finished jig and how it works:
(Seeing the jig in use before building it will help you visualize the tolerances and layout decisions below.)
Step-by-Step Instructions
Step 1: Determine Your Hinge Layout
Before cutting a single piece of plywood, know your hinge specs. Standard residential hinges are typically 3-1/2 inches for interior doors and 4 inches for exterior doors. Measure the hinges you’ll be using and write down:
- Hinge width (this sets your jig opening width)
- Hinge height/length (this sets your jig opening length)
- Hinge thickness (this sets your router depth)
Also decide on your hinge placement from the top and bottom of the door. Common residential layout: top hinge 7 inches from top of door, bottom hinge 11 inches from bottom of door, center hinge equidistant between the two. Mark these measurements for reference throughout the build.
Step 2: Cut Your Plywood Base Strips
Rip two strips of 3/4-inch plywood to a width that gives your router collar a solid running surface on either side of the hinge opening — generally 4 to 5 inches wide is comfortable. Cut these strips to approximately 20 inches in length.
For the center hinge location, cut a shorter section — you don’t need a full-length strip here, just enough material on each side of the center hinge opening (about 8–10 inches total) to support the router.
Step 3: Mark and Cut the Hinge Openings
This is the most critical step. Each opening in the jig needs to be slightly larger than the hinge itself — not the exact size of the hinge. The reason: your router collar rides around the inside of the opening, and the collar’s diameter offset is what produces the correct hinge footprint.
To calculate your opening size:
- Opening length = hinge length + (2 × collar offset)
- Opening width = hinge width + (2 × collar offset)
Collar offset is the distance from the outside of the collar to the outside of the bit. Check your collar specifications — a common offset is 1/8 inch, which means you’d add 1/4 inch total to each dimension.
Cut these openings cleanly using a jigsaw or router sled. The cleaner the opening, the cleaner your mortises will be.
Step 4: Install the U-Channel Metal Strips
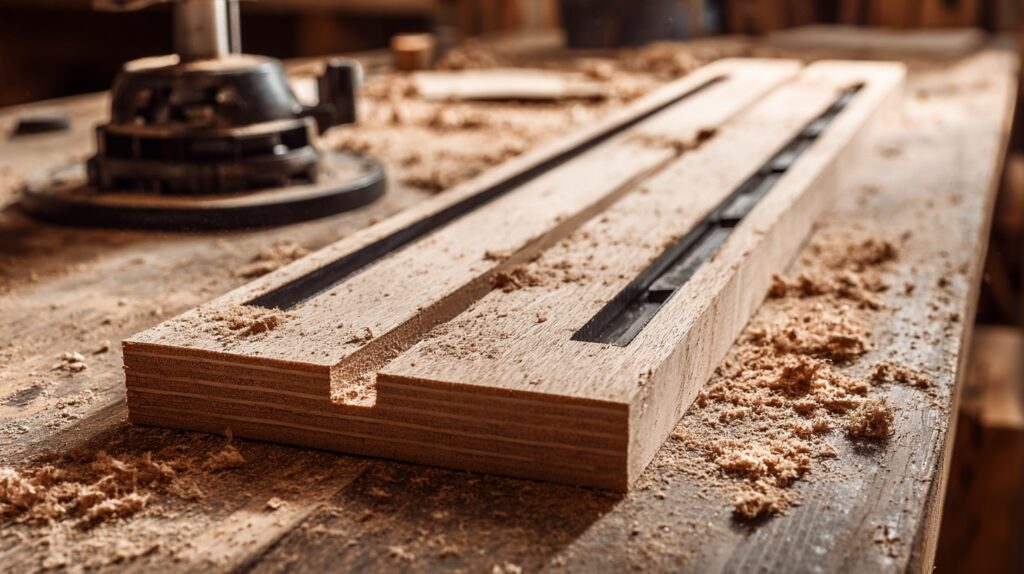
The U-channel strips serve as wear edges along the top of the jig — the router collar glides against them and they resist wear over time far better than bare plywood would. Attach one strip along each long edge of the hinge openings using short screws, flush with the top surface of the plywood. Make sure no screw heads protrude above the metal surface, or your router collar will catch on them.
Step 5: Add the Stop Block
This is the detail that makes the jig repeatable. Cut a piece of 3/4-inch plywood and attach it to the underside of the jig assembly at what will be the top edge. This block registers the jig against the top of the door or the door jam — every time you use it, the block seats in the same position, putting your hinges at exactly the same height.
Measure carefully and double-check by test-fitting against scrap material before permanently fastening the stop block.
Step 6: Label the Jig
Mark “TOP” clearly on the end with the stop block. This is not optional — in the shop or on a job site, it’s easy to flip a jig and throw off your entire layout. A piece of tape and a marker works fine; a wood-burned label is better.
Step 7: Set Your Router Depth
This step should always be done on scrap material before touching a real door. Chuck up your 1/2-inch straight bit, install the guide collar, and set the plunge depth to match the thickness of your hinge leaf. Test on a piece of the same species or at least similar density to your door material. Adjust until the hinge leaf sits perfectly flush — no rocking, no lip above the surface.
Step 8: Mortise Your Door
Clamp the jig to the door with the stop block seated firmly against the top edge. Apply a clamp at the far end to prevent any movement. With your router running, lower into the first hinge opening and work back and forth in overlapping passes until the mortise is fully cleared. Move to the center opening, then the bottom.
Repeat the exact process on the door jam, again registering from the top with the stop block.
For round-cornered hinges, you’re done. For square-cornered hinges, use a sharp hand chisel to clean up the rounded corners left by the router bit.
Pro Tips
- Always do a test run on scrap. Even experienced woodworkers do this. Depth is everything — too shallow and your door won’t close; too deep and the hinge rocks.
- Keep your collar tight. A loose guide collar will wander, causing inconsistent mortise sizes. Check it before every use.
- Wax the metal strips. A light coat of paste wax on the U-channel edges keeps the collar gliding smoothly and reduces chatter.
- Build for your specific hinges. This jig is sized for your standard hinges. If you switch to a different hinge brand or size for a job, verify the opening dimensions before routing.
- Three hinges is not optional. The center hinge isn’t decorative — it prevents the door from warping over time, especially in Florida’s humidity swings. Always install it.
- Work top-to-bottom on both pieces. Mortise the top hinge first on both the door and jam. This keeps your registration consistent and errors from compounding.
- Label multiple jigs. If you build jigs for 3-1/2 inch and 4-inch hinges, label them immediately and store them separately. They look nearly identical in a busy shop.
FAQ
Q: Can I use this jig with a plunge router or a fixed-base router? A: Either works, though a plunge router makes it easier to start the cut cleanly without tipping. With a fixed-base router, tilt carefully when entering the cut and keep the collar on the rail before lowering.
Q: What if my hinges have rounded corners but my mortises are coming out slightly rounded and the hinge isn’t fitting right? A: Check your collar offset calculation. If the opening is too small relative to your collar diameter, the effective mortise will be undersized. Slightly enlarging the jig opening is easier than modifying the collar.
Q: Do I need to use a 1/2-inch bit specifically? A: A 1/2-inch straight bit is a good general choice — it clears material efficiently and leaves a clean bottom. A 3/8-inch bit works but takes more passes. Avoid anything smaller for this application, as the bit will deflect.
Q: How do I handle pre-hung door frames where the jam is already assembled? A: The jig works the same way — just clamp carefully and make sure your stop block is registered against a consistent reference point. Pre-machined doors on job sites are where a consistent, repeatable jig really earns its keep.
Q: How long does this jig take to build? A: For an experienced woodworker, two to three hours including drying time if you use glue. Most of that time is layout and test-fitting rather than cutting.
Q: What does a commercial hinge jig offer that this doesn’t? A: Commercial jigs often have built-in depth stops, adjustable openings for multiple hinge sizes, and machined aluminum bodies. For production millwork shops doing dozens of doors daily in varied sizes, that adjustability is worth the price. For residential finishing work with consistent standard hinges, a shop-built jig like this one is genuinely equivalent in use.
Conclusion
A shop-built hinge mortising jig is one of those projects that pays for itself on the first door you hang with it. The investment is minimal — scrap plywood, a few dollars in metal strips, and an afternoon — and the payoff is consistent, professional-quality mortises every time without spending $400 on a commercial jig.
More importantly, building your own jig forces you to understand exactly what it’s doing, which makes you a better finisher. You know why the collar offset matters, why the stop block is there, and why “close enough” isn’t close enough when you’re hanging three hinges that all have to line up perfectly.
Take your time on the test runs, label everything, and wax those metal rails. Your doors will hang square, close cleanly, and last for decades.