
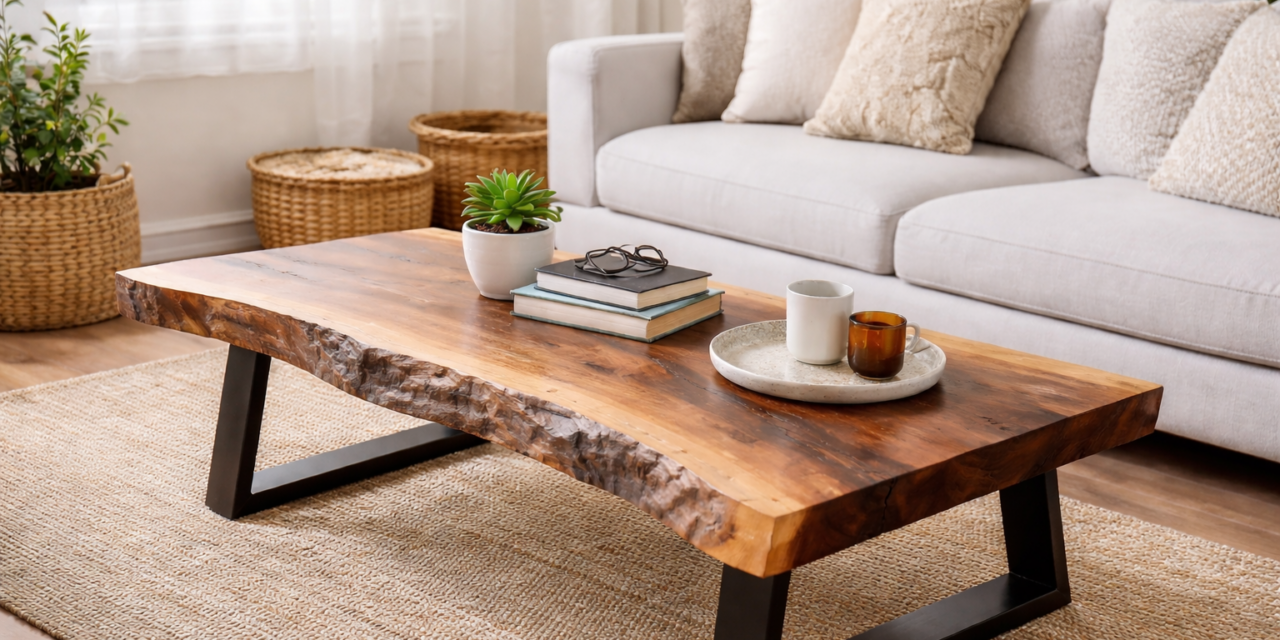
A live edge coffee table is one of the most rewarding woodworking projects you can tackle. It combines the raw beauty of natural wood with practical furniture-making skills, and the end result is a one-of-a-kind centerpiece that no furniture store can replicate. In this guide, we’ve synthesized insights from three different builders — each with their own approach — so you get a complete picture of the entire process from slab selection to final finish.
What You’ll Need
Materials
- Live edge slab (walnut, sweet gum, spalted maple, or similar) — aim for 2″+ thickness
- Epoxy resin (for filling voids and cracks)
- Rubio Monocoat Pure, wipe-on polyurethane, or your preferred finish
- Wood glue
- Star Bond CA glue (for small holes)
- Table legs — metal hairpin, welded steel, or live edge wood leg
- Steel C-channel (for warp prevention on larger slabs)
- Threaded inserts and furniture bolts
- Sandpaper: 80, 120, 220 grit
- Resin tape
- Black spray paint (if using metal legs)
Tools
- Router sled or flattening mill
- Circular saw or track saw
- Belt sander
- Random orbital sander (Rotex or similar)
- Angle grinder with flap wheel
- Chisel and mallet
- Drill and bits
- Bar clamps
- Wire brush
- Awl or drawknife (for bark removal)
- Dremel (optional, for cleaning voids)
- Drum sander (optional)
- Welder (if making metal legs)
- Compressed air
Step 1: Choosing Your Slab
The slab is everything. This is where your table begins and ends. You have a few options for sourcing: local sawmills, lumber yards that specialize in slabs, online retailers like Horizon Wood Products who will ship directly to your curb, or if you’re lucky, wood from a family property like spalted maple from a grandfather’s sawmill.
When selecting a slab, look for interesting grain, natural voids, and live edges on at least one side. Don’t be put off by a rough, dirty appearance — as one builder put it, “a lot of people think when they see a bunch of old beat up wood that it’s trash because it’s gross and it’s covered and nasty but if you just clean it up it looks beautiful again.”
For a standard coffee table, aim for a slab that’s roughly 48-58 inches long, 20-30 inches wide, and at least 2 inches thick. Thickness matters because flattening will remove material, and you want to end up with a substantial 1.5″+ finished top.
Popular species for live edge coffee tables include walnut (stunning grain, works beautifully), sweet gum (surprisingly beautiful when cleaned up), spalted maple (dramatic figure and coloring), and cherry. Each has different working properties but all produce excellent results.
Step 2: Removing the Bark
Before anything else, remove the bark from the live edges. This is non-negotiable — bark will eventually fall off on its own, leaving your finished table with ugly gaps. Better to remove it now on your terms.
Start with an awl, chisel, or drawknife to pop off loose bark. For stubborn bark, an angle grinder works fast. Follow up with a wire brush to clean up any remaining loose pieces and debris along the edge. Take your time here — the live edge is the feature of the entire piece and it deserves careful attention.
Step 3: Flattening the Slab
This is the most technically demanding step and the one that trips up most beginners. Raw slabs are almost never flat — they cup, bow, and twist during drying. Your job is to get both faces flat and parallel to each other.
The most accessible method is a router sled (also called a flattening mill). You build or buy a sled that rides on rails above the slab, then make repeated passes with a large surfacing router bit, removing a small amount of material each pass.
Here’s how to set it up:
- Shim the slab so it doesn’t rock on your work surface
- Secure it so it can’t move during routing
- Find the highest spot and set your bit depth to remove about 1/8″ per pass
- Make overlapping passes across the entire surface
- Lower the bit slightly and repeat until the face is flat
- Flip the slab and repeat on the second face
If your slab is small enough to fit through a thickness planer, that’s faster — shim one face against a flat piece of plywood, run it through to establish a flat reference face, flip it, and plane the second side flat and parallel.
Pro tip: Don’t worry about getting the bottom perfectly flat. As one builder noted, “as long as the legs sit flat that’s really all that matters.”
Watch: Building a Live Edge Coffee Table with DIY Metal Legs
This builder walks through the full process including building welded steel legs from scratch — a great option if you want that modern industrial look:
Step 4: Filling Voids and Cracks with Epoxy
Live edge slabs almost always have natural voids, cracks, and checks — these are part of what makes them beautiful. Epoxy fills them permanently and can add a striking visual element, especially with tinted or colored resin.
Before pouring epoxy, clean out every void thoroughly. Use a chisel, Dremel, or even a dentist’s teeth scraper to remove all loose wood, debris, and dead material. The epoxy needs a clean surface to bond to properly.
Apply resin tape along the edges to prevent epoxy from dripping off. When mixing, follow your epoxy manufacturer’s ratio exactly — this is where most mistakes happen.
For small cracks, use a syringe for precision. For larger voids, pour directly. Work slowly and expect the epoxy to find its own level. Bubbles are normal — use a heat gun or torch briefly over the surface to pop them.
Let the epoxy cure fully (typically 24-72 hours depending on product), then sand flush. If any low spots remain, apply a second pour. CA glue like Star Bond works well for tiny pinholes that appear after sanding.
Important: Epoxy can be frustrating the first time. As one builder admitted openly, “I have absolutely no idea what I’m doing with epoxy.” Don’t be discouraged — it takes practice and every experienced woodworker has epoxy disaster stories.
Watch: Live Edge Sweet Gum Slab Coffee Table Build
This honest and detailed walkthrough shows every mistake and how to recover from them — including epoxy challenges and router sled work:
Step 5: Sanding
Sanding is where good projects become great ones. Don’t rush it.
Start at 80 grit to remove any router sled marks, epoxy residue, or major imperfections. Move to 120 grit — at this stage you’ll start seeing any remaining issues clearly. Fix them now before moving on. Finish at 220 grit for a smooth surface ready for finishing.
Always sand with the grain. Between grits, blow off all dust with compressed air before continuing. Dust in your finish is the enemy.
Pay attention to the live edges too — knock off any remaining sharp points with 120 grit and smooth the transitions between the flat face and the natural edge.
Step 6: Adding Warp Prevention (For Larger Slabs)
For slabs wider than 18-20 inches, consider adding steel C-channel to the underside to prevent future cupping. This is especially important in humid climates or if your slab is younger wood that hasn’t fully stabilized.
Cut grooves on the underside of the slab to recess the C-channel flush. Use a router with an edge guide for clean, straight grooves. Install threaded inserts into the slab, then bolt the C-channel into place. Critically — use elongated slots, not round holes, so the wood can still expand and contract with seasonal humidity changes. Locking the wood completely rigid risks cracking the slab over time.
Step 7: Finishing
Your finish choice dramatically affects the final look and feel. Here are the most popular options for live edge tables:
Rubio Monocoat is a favorite among serious woodworkers. It’s a hardwax oil that penetrates the wood rather than sitting on top, giving a natural matte look that feels like wood rather than plastic. Apply with a brush, let it sit 10-15 minutes, buff in with a pad, wipe off excess. One coat is usually sufficient.
Wipe-on polyurethane is more beginner-friendly and provides excellent protection. Apply thin coats with a rag, let dry, sand lightly between coats with 320 grit, and apply 2-3 coats total. Gives a slight sheen that accentuates grain.
Oil finishes (Danish oil, tung oil, linseed oil) are the easiest to apply and repair but offer less protection. Good for lower-traffic pieces.
Whichever finish you choose, apply it in a clean environment. Dust settling into wet finish is a common frustration — blow off the piece with compressed air right before applying.
Watch: Building a Live Edge Waterfall Coffee Table
Popular Woodworking’s David Lyell demonstrates the waterfall style — where the grain wraps around a 45-degree mitered corner for a stunning continuous effect:
Step 8: Legs and Final Assembly
You have three main options for legs:
Welded metal legs give a modern industrial look. If you weld, you can build custom steel tube legs cut at 45 degrees, tack welded, ground smooth, and spray painted. The combination of raw wood and black steel is a timeless pairing.
Hairpin legs are the easiest option — buy them pre-made in any height, drill pilot holes, and screw directly into the underside. Available in steel, brass, and copper finishes.
Live edge wood legs create a fully organic look. Use a secondary slab piece, joint the inside edge square, and attach with dowels or hardware brackets. This is the approach used in the waterfall style build.
For any leg style, do a test fit before committing. Measure leg placement off the edges carefully — the live edge isn’t straight so you can’t measure from it directly. Measure off a centerline or use consistent offsets from each end.
Use threaded inserts for metal legs rather than wood screws — they’re stronger and allow you to remove and reinstall legs without stripping the wood.
Tips From the Builders
- Let welds cool completely before unclamping — heat deforms metal and you’ll end up with a rocking table instead of a coffee table
- Don’t flatten the bottom perfectly — just flat enough that the legs sit solid
- Clean epoxy before final sanding with mineral spirits to see how it really looks
- Elongated slots on leg hardware allow seasonal wood movement — skipping this risks cracking your slab
- One butterfly patch on a fallen-out knot is a feature, not a flaw — embrace it
- Sanding is not optional — every builder emphasized this. It’s the difference between a rough project and a beautiful piece of furniture
Frequently Asked Questions
What wood species is best for a live edge coffee table?
Walnut is the gold standard — beautiful grain, stable, and finishes easily. But don’t overlook sweet gum, maple, cherry, or whatever local species your sawmill carries. Local wood is often more affordable and just as beautiful.
Do I need a router sled to flatten a slab?
Not necessarily. If your slab fits through a thickness planer, that’s faster. For very small slabs, a hand plane and winding sticks can work. But for most coffee table-sized slabs, a router sled is the most practical tool.
Should I use epoxy to fill all the voids?
It’s your choice. Some woodworkers love the glass-filled look. Others prefer to keep the piece entirely natural and leave small voids open. Both approaches are valid — it’s an aesthetic decision.
How long does the whole project take?
Expect 2-4 weekends for a first build. The biggest time consumers are epoxy cure time (24-72 hours per pour) and finish drying time. The actual woodworking goes faster than most beginners expect.
What height should a coffee table be?
Standard coffee table height is 16-18 inches. A good rule of thumb is that it should be roughly the same height as your sofa cushions or slightly lower.
Final Thoughts
Building a live edge coffee table is achievable for woodworkers at almost any skill level. The tools required are common, the techniques are learnable, and the materials — while sometimes expensive — are available nationwide. More importantly, the result is something no store can sell you: a functional piece of furniture with a story, built by your own hands from a piece of wood that grew for decades before becoming part of your home.
Start with a slab that speaks to you. The rest will follow.