

Cabinet building looks complicated from the outside, but at its core every cabinet — from a simple kitchen wall unit to a full custom built-in — is just a box. Once you understand how that box goes together, you can build virtually anything. This guide walks you through constructing a functional upper cabinet from scratch using maple plywood, covering every stage from pre-cutting parts to sliding in the back panel and installing screw rails for wall mounting. The cabinet built here is a 30-inch wide over-stove unit designed to house a microwave and range hood, but the techniques and sequence apply to any basic cabinet box you’ll ever build.
Materials List
- 3/4-inch maple plywood — for top, bottom, and two side panels
- 1/8-inch plywood or hardboard — for the back panel
- Iron-on edge banding — maple veneer, pre-glued, slightly wider than your plywood thickness
- Wood glue
- 1-1/2-inch wood screws — for assembling the box
- 2-1/2-inch wood screws — for the screw rails (wall mounting)
- Screw cap covers — plastic, available at lumber yards and hardware stores
- Pin nails — for tacking panels during assembly
Tools List
- Table saw or circular saw — for ripping panels to size
- Router or table saw dado stack — for cutting the 1/8-inch back panel dado groove
- Countersink bit
- Drill/driver
- Pin nailer (optional but helpful for tacking during assembly)
- Iron — a standard household iron works fine
- File — for trimming edge banding ends and edges
- Edge trimmer (optional — a file does the same job)
- Sanding block with used sanding belt material
- Square — for checking cabinet during assembly
- Shop assembly jig or corner clamps — for squaring up the box
Before You Cut: Understanding the Parts of a Cabinet Box
A basic cabinet box has six components: two side panels, a top, a bottom, a back, and screw rails. That’s it. Understanding how they relate to each other before you pick up a saw prevents the most common beginner mistakes — cut parts that don’t fit, or panels assembled in the wrong orientation.
The key detail that ties everything together is the dado groove — a shallow channel cut into the inside face of each side panel and along the top and bottom panels. This groove accepts the 1/8-inch back panel, which slides in during assembly and does two jobs: it keeps the cabinet square and gives it rigidity. Without the back, even a well-glued and screwed box will rack over time.
Standard residential upper cabinet dimensions are 30 inches wide (to accommodate standard range hood widths) and 12 inches deep. This build goes to 14 inches deep to accommodate a slightly oversized microwave — a reminder that cabinet dimensions are always driven by what goes inside them.
Step-by-Step Instructions
Step 1: Pre-Cut All Your Panels
Mill all six parts before assembly begins. Cut your two side panels, top, bottom, back panel, and screw rails to finished size. Label each piece clearly — in cabinet work there are lefts and rights, tops and bottoms, and inside faces versus outside faces. A pencil mark on the inside face of each panel before anything else gets cut or routed will save you from assembling a panel backwards.
Keep your cuts clean and square. Any out-of-square cut in the panels will compound through the assembly and leave you with a cabinet that doesn’t sit flat against a wall.
Step 2: Cut the Dado Grooves for the Back Panel
The 1/8-inch dado groove runs along the inside face of both side panels and along the top and bottom panels. Position it approximately 3/8 inch in from the back edge of each panel — this setback allows the back panel to sit recessed rather than flush, which is standard practice and keeps the back from being visible once the cabinet is installed.
Cut these grooves consistently on all four panels. The groove depth should be approximately 1/4 inch — enough to capture the back panel securely without weakening the panel. A router with a straight bit and edge guide, or a table saw with a dado stack, both handle this cleanly.
Note that the dado on the side panels runs the full length of the panel — it will extend past where the top and bottom panels intersect. This is intentional and not an error. The back panel slides in from the open end of the box during assembly and the groove guides it into position.
Step 3: Apply Edge Banding to Exposed Edges
Any plywood edge that will be visible in the finished cabinet needs edge banding before assembly. On this over-stove cabinet, the bottom front edge of the top panel and the front edges of the side panels all require it. The back edges don’t — they’ll be hidden against the wall.
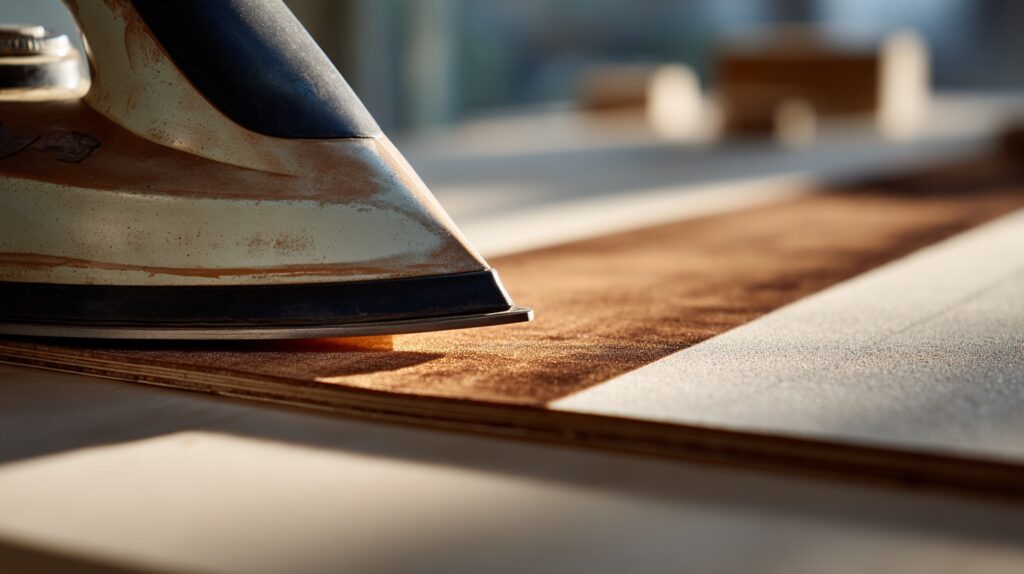
Pre-glued iron-on edge banding makes this straightforward. Cut a strip slightly longer than the edge you’re covering. Set your iron to its highest setting. Place the edge banding glue-side down on the plywood edge and run the iron along it steadily — the key is to keep the iron moving at all times. A stationary iron will scorch the veneer face and leave burn marks that require extra sanding to correct. Make several passes until the edge feels hot to the touch when you press it with your hand.
Immediately press the banding down firmly using a flat block of wood or a rubber roller. This seats the hot glue fully into the plywood surface before it cools.
Once cooled, trim the ends flush using a file — a few strokes at a slight angle to the corner takes the overhang off cleanly. Do the same on both long edges. Finish with a light pass of a sanding block along all four edges to remove any fuzz or slight sharpness left by the file. Done correctly, the edge banding is nearly indistinguishable from the solid maple face of the plywood.
Step 4: Assemble the Top Panel to the Side Panels
Start assembly with the top panel. Orient it with the dado groove facing downward (toward where the back panel will eventually go) and the finished face upward. This is your first reference point — if the dado faces the wrong direction, the back panel won’t seat correctly.
Apply a thin bead of wood glue along the mating edge of the side panel. Bring the top panel into position — remember that side panels fit inside the top and bottom on this style of box, so the side panels sit between the top and bottom, not outside them. Pin nail in a couple of spots to hold the joint while you drive screws.
Using a countersink bit, drill two countersunk pilot holes through the top panel into the side panel end grain. Drive 1-1/2-inch screws. Don’t over-countersink — the screw head needs to sit just flush with the surface so the plastic cap covers can snap in and grip properly. An over-countersunk hole leaves the cap sitting loose.
Repeat on the opposite side panel.
Step 5: Install the Bottom Panel
Slide the back panel partially into its dado groove — just enough to use it as a depth guide for positioning the bottom panel. You’re not gluing the back in yet; this step just helps you get the bottom panel at the correct depth before fastening it.
Apply glue, bring the bottom panel into position with its finished face up and front edge flush with the front edges of the side panels, and pin nail to hold it. Countersink and screw as you did on the top.
(Seeing the assembly sequence in motion — especially how the back panel slides in and how the screw rails install — will clarify a few steps that are easier to show than describe.)
Step 6: Slide In the Back Panel and Square the Box
With the top, bottom, and sides all fastened, slide the 1/8-inch back panel fully into its dado grooves. Lay the entire cabinet flat on your assembly surface. The back panel, once fully seated in all four grooves, will pull the box square — this is the moment when a slightly racked assembly corrects itself, which is one of the primary reasons for using a back panel rather than relying on the screwed joints alone.
Check for square by measuring diagonally corner to corner in both directions. If the measurements match, you’re square. If they don’t, apply light pressure to the longer diagonal until they equalize, then nail the back panel in place before it moves.
Step 7: Install the Screw Rails
Screw rails are horizontal pieces of wood — typically 1×3 or cut-down plywood strips — that run across the inside top and bottom of the cabinet, front to back, flush with the inside faces. They serve one purpose: giving you solid material to drive long screws through when mounting the cabinet to wall studs.
Install the bottom screw rail first. It sits inside the cabinet at the bottom, with its finished side facing up (into the cabinet interior). Nail it along its length into the back panel and into the bottom panel. Add a couple of nails into each end where it meets the side panels.
The top screw rail installs the same way at the top of the cabinet interior. Nail down through the top panel into the screw rail and through the ends into the side panels.
Once the cabinet goes on the wall, 2-1/2-inch screws driven through these rails and into studs hold everything securely. Cover the screw heads with white plastic caps for a clean finished appearance inside the cabinet.
Pro Tips
- Label inside faces before cutting. Once panels are stacked and look identical, it’s easy to lose track of which face is which. Mark inside faces with a pencil X as your very first step.
- Keep the iron moving during edge banding. This cannot be overstated — a stationary iron scorches the veneer and the repair takes longer than the original application.
- Don’t glue the back panel in. The back panel gets nailed in place but traditionally not glued. Keeping it unglued allows the back to expand and contract with humidity changes without cracking or distorting the box.
- Use pin nails to tack before screwing. Trying to hold a panel in position with one hand while drilling and driving screws with the other is a recipe for misalignment. Two or three pin nails buy you both hands back.
- Check flush at the front before every screw. The front edges of all panels need to be perfectly flush — this is the reference surface for your doors and face frame if you add them later. Check it every time before driving a screw.
- An assembly square or shop jig pays for itself immediately. Even a simple shop-made corner jig keeps panels at 90 degrees during assembly and eliminates a lot of “measure and hope” squaring at the end.
- Cap screw holes flush, not deep. Countersink just enough for the screw head to sit flush. Too deep and the plastic cap won’t grip — it’ll pop out every time someone opens the cabinet.
FAQ
Q: Can I use MDF instead of plywood for the cabinet box? A: MDF is stable, flat, and machines cleanly, making it a reasonable choice for painted cabinets. Its weaknesses are weight (significantly heavier than plywood) and poor screw-holding in end grain. If you use MDF, use confirmat screws or pocket screws rather than standard wood screws driven into the edges.
Q: Does the back panel actually need to be 1/8-inch? Can I use thicker material? A: You can use 1/4-inch material, which is sturdier and more common in higher-end cabinetry. If you do, adjust your dado groove size accordingly. The 1/8-inch back is standard for lightweight upper cabinets where weight is a consideration.
Q: What if I don’t have a router to cut the dado grooves? A: A table saw with a standard blade can cut dadoes by making multiple passes — set the fence, cut one side, shift slightly, and work across until you reach the desired width. It’s slower but produces the same result. Alternatively, some woodworkers skip the dado entirely and just nail the back panel to the back edges of the box. It works, but the dado method produces a noticeably more rigid cabinet.
Q: Do I need to edge band all plywood edges? A: Only visible ones. On this cabinet, the back edges and the top edge of the top panel won’t be seen — no banding needed. The front edges and any edges facing into an open interior space should be banded, especially if the cabinet will be painted, since raw plywood edges don’t accept paint evenly.
Q: How do I know where the studs are to mount the cabinet? A: Use an electronic stud finder before you install, and mark stud locations on the wall with painter’s tape. Standard stud spacing is 16 inches on center. Locate at least two studs for a 30-inch cabinet and drive your mounting screws through both screw rails into solid stud material.
Q: Can this same box method be used for base cabinets? A: Yes, with modifications — base cabinets typically include a toe kick cutout, a separate stretcher at the top front (rather than a full top panel), and different depth and height dimensions. The assembly sequence and joinery techniques are identical.
Conclusion
Building a cabinet box from scratch is one of those skills that compounds rapidly. The first one takes an afternoon and a lot of double-checking. By the third or fourth, the sequence is automatic — cut, dado, band, assemble, square, rail. What seemed like a complicated furniture trade becomes a logical, repeatable process. Start with a simple upper cabinet like this one, pay attention to which faces go where, keep your front edges flush, and use that back panel to pull the box square. Nail those fundamentals and you’re equipped to build everything from a basic pantry cabinet to a full kitchen’s worth of custom cabinetry — one box at a time.